MagicTints allows to color match to arbitrary images. It works inside Adobe Photoshop, Illustrator and InDesign. It can also export LUT (of any size) from just a single color reference. So you can use its color matching in video production, Adobe Premiere, AfterEffects, Lightroom, Unity, Unreal Engine, DaVinci Resolve etc.
All in one click!
MagicTints uses all your CPU cores, advanced Machine Learning (learns from your images), and GPU processing (AMD & NVidia) so it's very fast and smart.
Panel And Desktop versions:
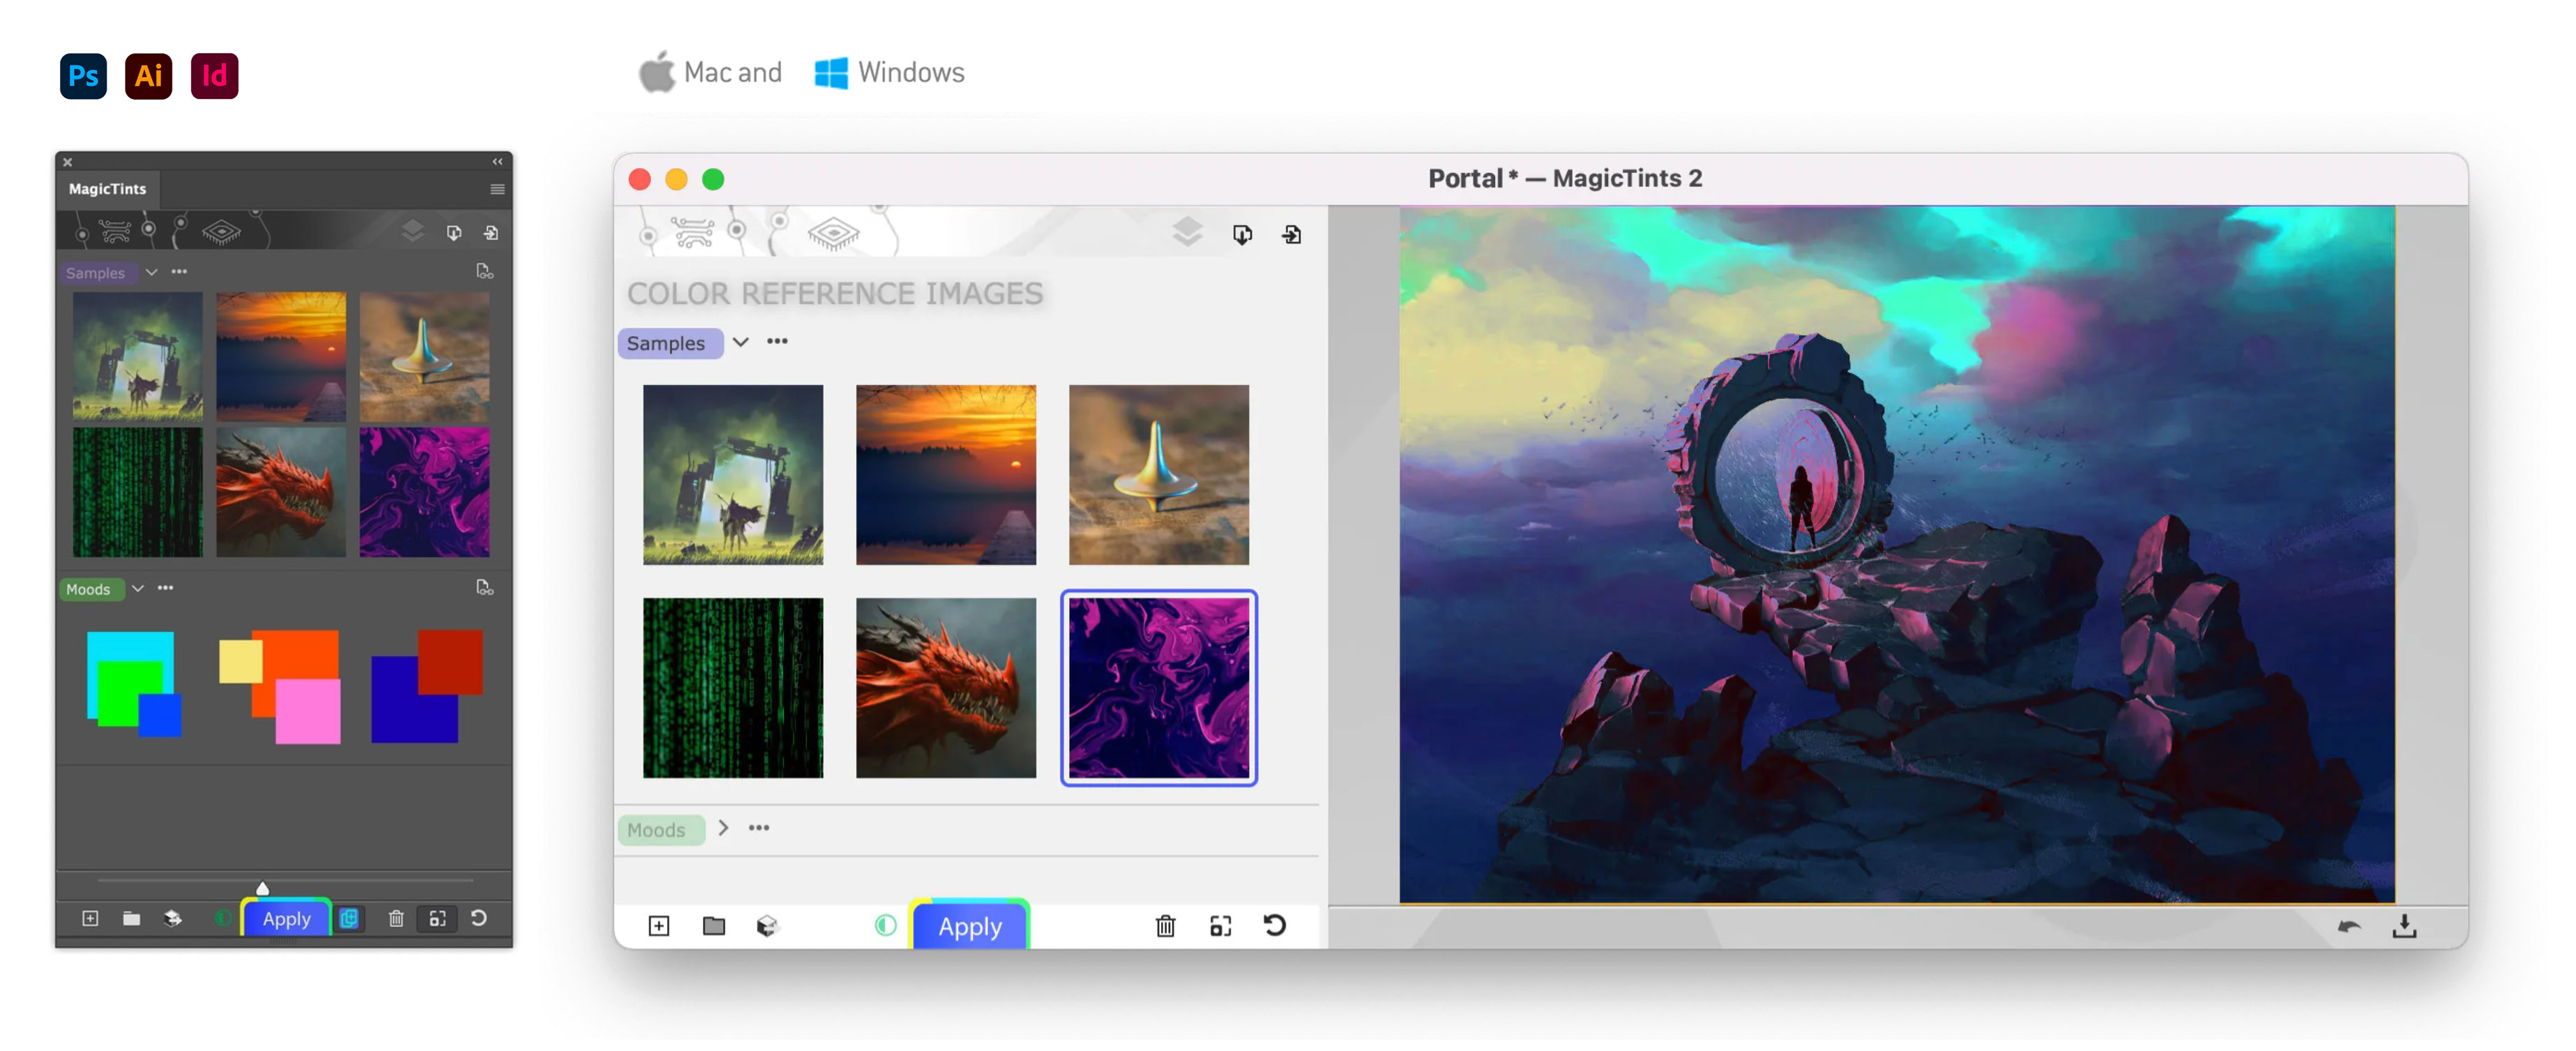
MagicTints comes in two flavors: plugin for Adobe Creative Cloud (Photoshop CC, InDesign CC, Illustrator CC) and a standalone Desktop application for macOS and Windows:
macOS/Windows: Please double-click installation package (MagicTintsInstall.exe on Windows and MagiTints.dmg on macOS) to start.
Cheat Sheet:
The following diagram shows main MagicTints features. It applies both to Panel and Desktop versions.
The main difference is that on Desktop the fly-out menu iteams are available from Main Menu of the application. There's also an additional "Save As" menu item to specify file name when saving. And there's also an "Undo" function.
How to use MagicTints
Using MagicTints is very simple:
1 Add a color reference image into the panel 2 Select a layer in Photoshop you want to transform 3 Click "Apply"
That's it! MagicTints will automagically color grade your Photoshop layer. Its colors will look exactly the same as selected color reference.
You keep all color reference images inside the panel. To add new color reference:
• Click "New" button on the bottom toolbar — this way you can add images, folders and even specify color swatches!
• Use a Keyboard Shortcut specified in Settings to do that
• Use a Keyboard Shortcut to paste image from clipboard
• Click Bring Reference Layer from Document button on top of the panel to add current Layer from Photoshop
• Drag'n'drop images or folders to the panel directly from Finder or Explorer
*adding a folder will automatically create a new group
How to export LUT
You can export a LUT file from color conversion. You can use it later on in video post-production, 3D software, video, Unity, Unreal Engine, Adobe Premiere, Adobe AfterEffects etc.
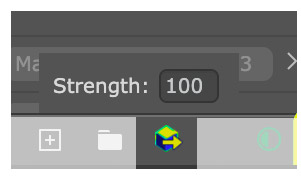
Select a color reference and click Export LUT button. MagicTints will generate a .cube or .png file.
Specify LUT Strength by editing value in a popup that appears
Set LUT size from 16x16x16 to 256x256x256 in Settings
Use Photoshop Layer as color source
Types of color sources: Images, Palettes and Layers
There are two types of what you can use as color source:
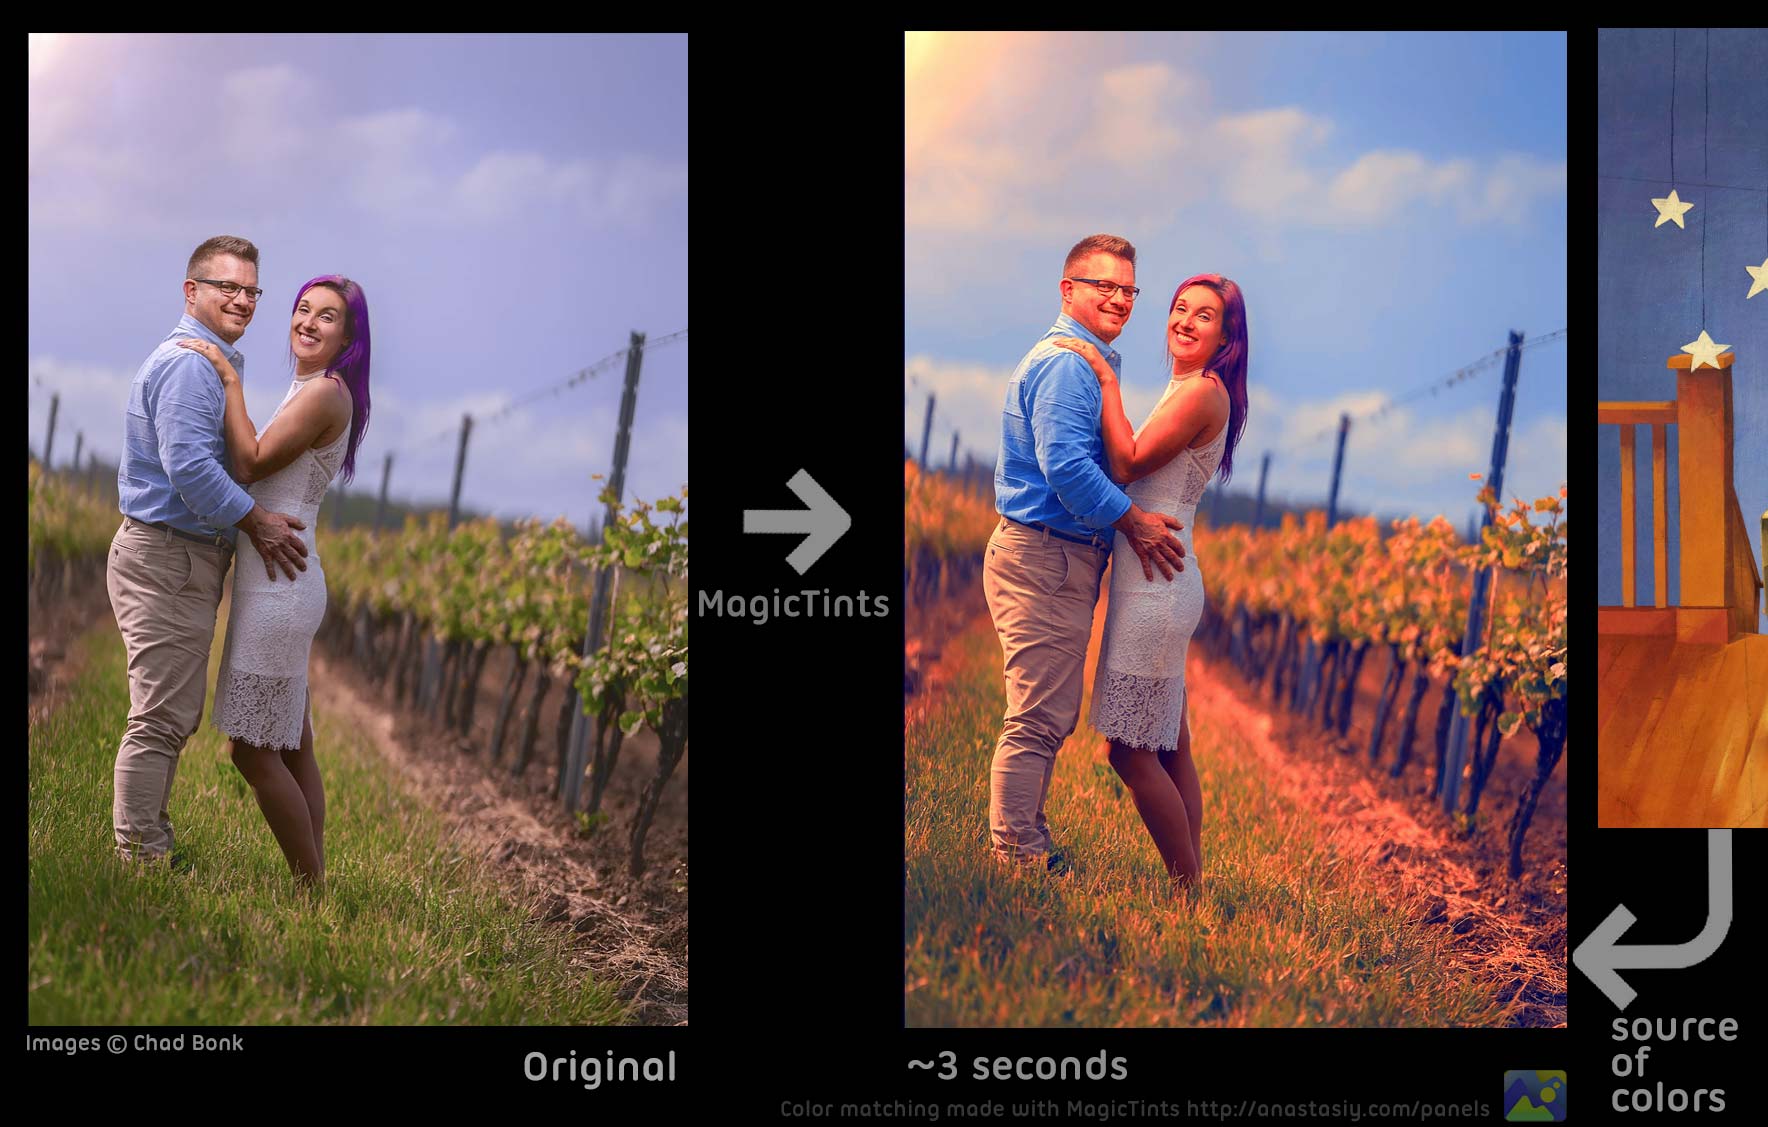
Image Color Reference – use any .jpg, .tif, .psd, etc image of any size (preferrably RGB). MagicTints will then use advanced GPU processing to apply colors from the Image Color Reference to your current document. It will analyze your source and target images and apply corresponding colors from one to another.
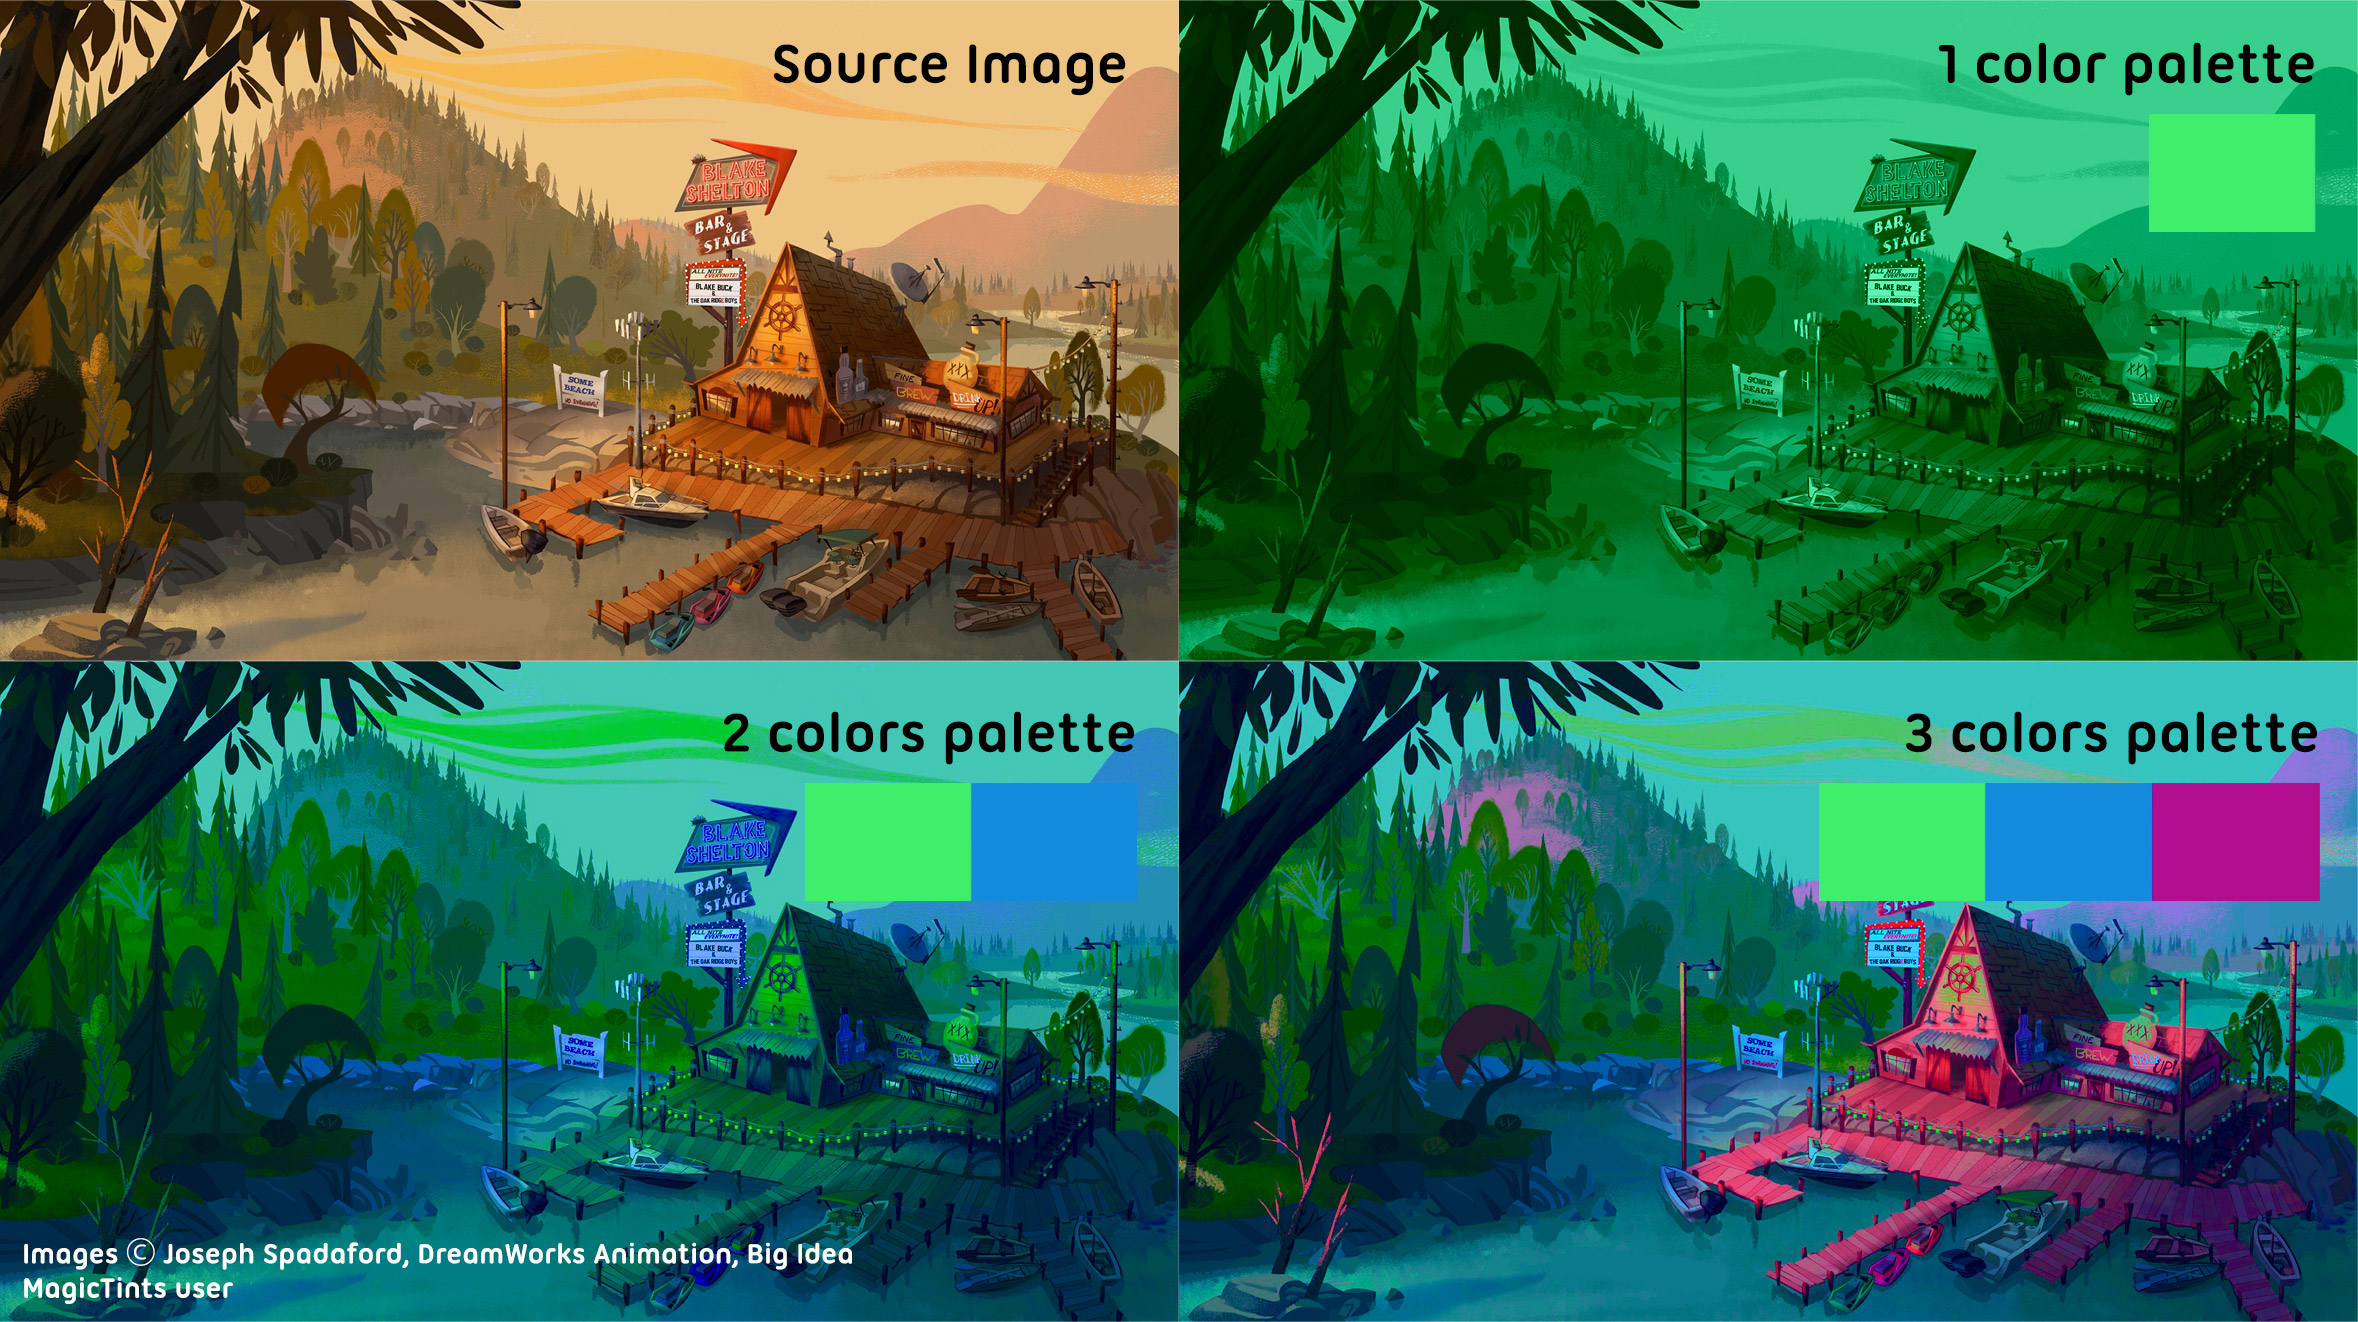
Palette Color Reference – specify a limited number of colors and apply to current document. The result will be significantly different than just limiting colors in the target document. MagicTints will analyze your target image and smartly will recolor it.
Photoshop-only Layer. You can select a layer in your Document and use as color source. Layer can be hidden. So this way you can quickly color match any layer on top of the background to the colors of the background (or any other layer).
Example of applying Image Color Reference
Example of applying Palette Color Reference
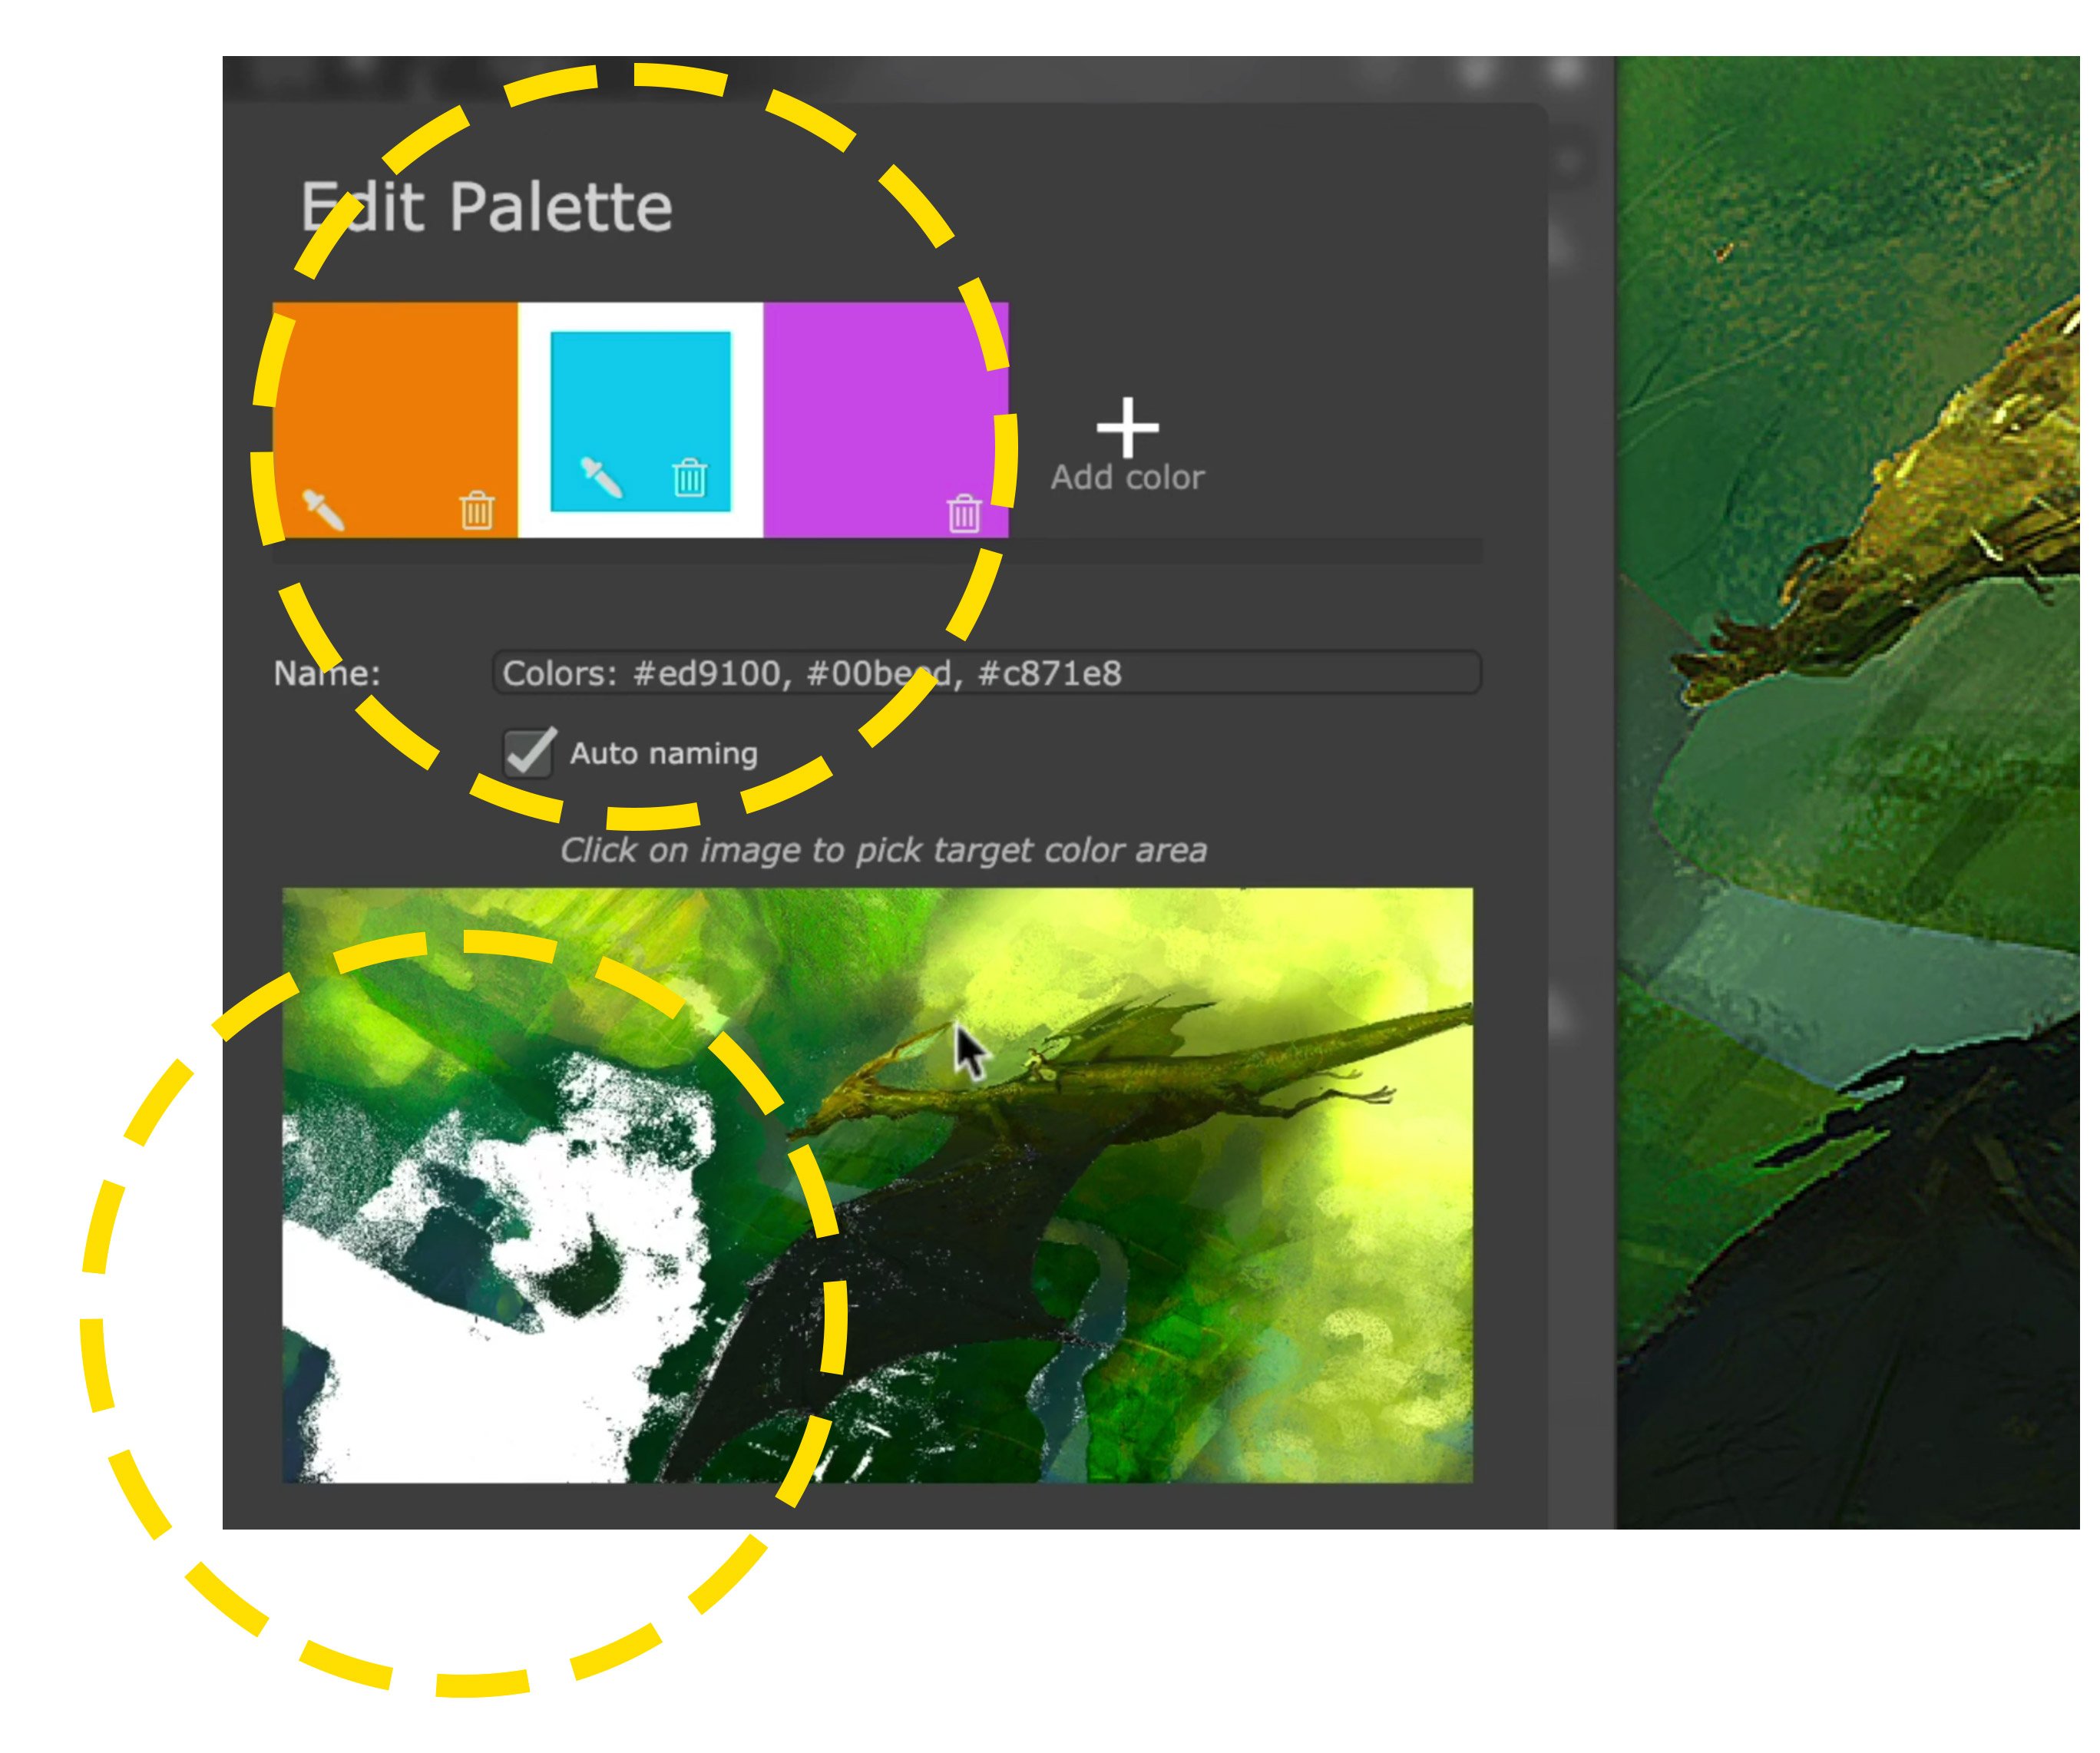
Guided Palette allows to specify colors on the target image that palette colors will be assigned to.
Click on the button and then click palette colors one by one and click on the image in the dialog to select the area.
To remove color connection click on the eyedropper icon on the color swatch.
You can completely unconnect palette from any image by clicking "Disabled guided colors".
MagicTints Desktop supports Batch Processing of images! Just select multiple images or drag'n'drop files on the panel. Then click Apply and all images will all be assigned same color palette from the selected source.
Settings Dialog - LUT Size, Keyboard Shortcut etc.
NOTE: On MagicTints Desktop please use Main Menu items instead of Keyboard Shortcuts. You can also assign Keyboard Shortcuts to the menu items (using Windows/macOS standard procedures).
Click MagicTints Menu > Settings to get access to MagicTints Settings Dialog. Where you can adjust export LUT Size, assign Keyboard Shortcuts or relocate Data Folder:
1. Specify Keyboard shortcuts. Navigate to the appropriate field and just press a key combination. After that the function will be available inside Photoshop by pressing a shortcut:
- New Image from Clipboard: Add image from Clipboard as new color reference
- Generate LUT: Export LUT from current color match
- Apply: Apply currently selected color reference to image/layer
- Add Layer: Photoshop-only: add currently selected layer a Color Reference
- Add Image: Add new image or image folder from your hard drive. Also allows to specify color swatches
- New Group: Create new empty group with color reference images
- Toggle History: Show/Hide image history
- Thumbnails Larger by []: Increase size of thumbnails
- Thumbnails Smaller by []: Decrease size of thumbnails
- Toggle MagicTints: Hide/show MagicTints panel
2. Double-click to display full image If checked then MagicTints will display your thumbnail in full size by double-clicking on it. If unchecked it will display it in full size by a single-click
3. Trim layers. Advanced option! If color-matched layers do not display correctly in Photoshop, have wrong size or cut offs, try to turn it on.
4. LUT Export size. Specify size of LUT when you export it as a file or .png. If you want to export is as a .png for Unity or Unreal Engine then you need to set it to 16 x 16 x 16 (it will generate a 16 x 256 .png). Any LUT sizes are supported: 16 x 16 x 16, 17 x 17 x 17, 32 x 32 x 32, 33 x 33 x 33, 64 x 64 x 64, 128 x 128 x 128 etc.
5. Data Folder. You can specify a place where MagicTints keeps all the images you add. Just click Browse and point MagicTints to a new place - it will copy all your existing color references to a new place. You can place them on Dropbox, Google Drive, iCloud - anywhere. By default all images are located in your Documents/MagicTints folder.
Explanation of error messages
"Could not color match layers...Please make sure layers are not single Solid color fills or Smart objects" Layers you're trying to color match need to be rasterized. Please right-click on the layers and choose "Rasterize", then color-match again.
"Please make sure you're using raster images and try again!"
On a Desktop version (macOS/Windows) you cannot match .pdf, .svg or any vector images. Please convert them to raster .jpg, .png or .gif
Right-click menu:
If you right-click on the color reference image, a right-click menu will pop up. It will allow you to quickly apply this reference image to the current layer in Adobe Photoshop or locate it in your File Explorer (Windows) or Finder (macOS).
Video how-tos:
MagicTints 3 – guided colors, use layer as color source, edit color palette, batch processing


 You can export a LUT file from color conversion. You can use it later on in video post-production, 3D software, video, Unity, Unreal Engine, Adobe Premiere, Adobe AfterEffects etc.
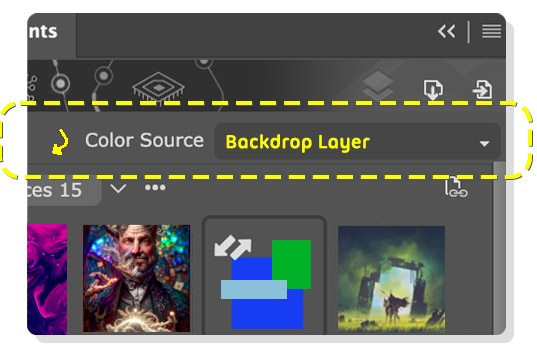
 button and then click palette colors one by one and click on the image in the dialog to select the area.
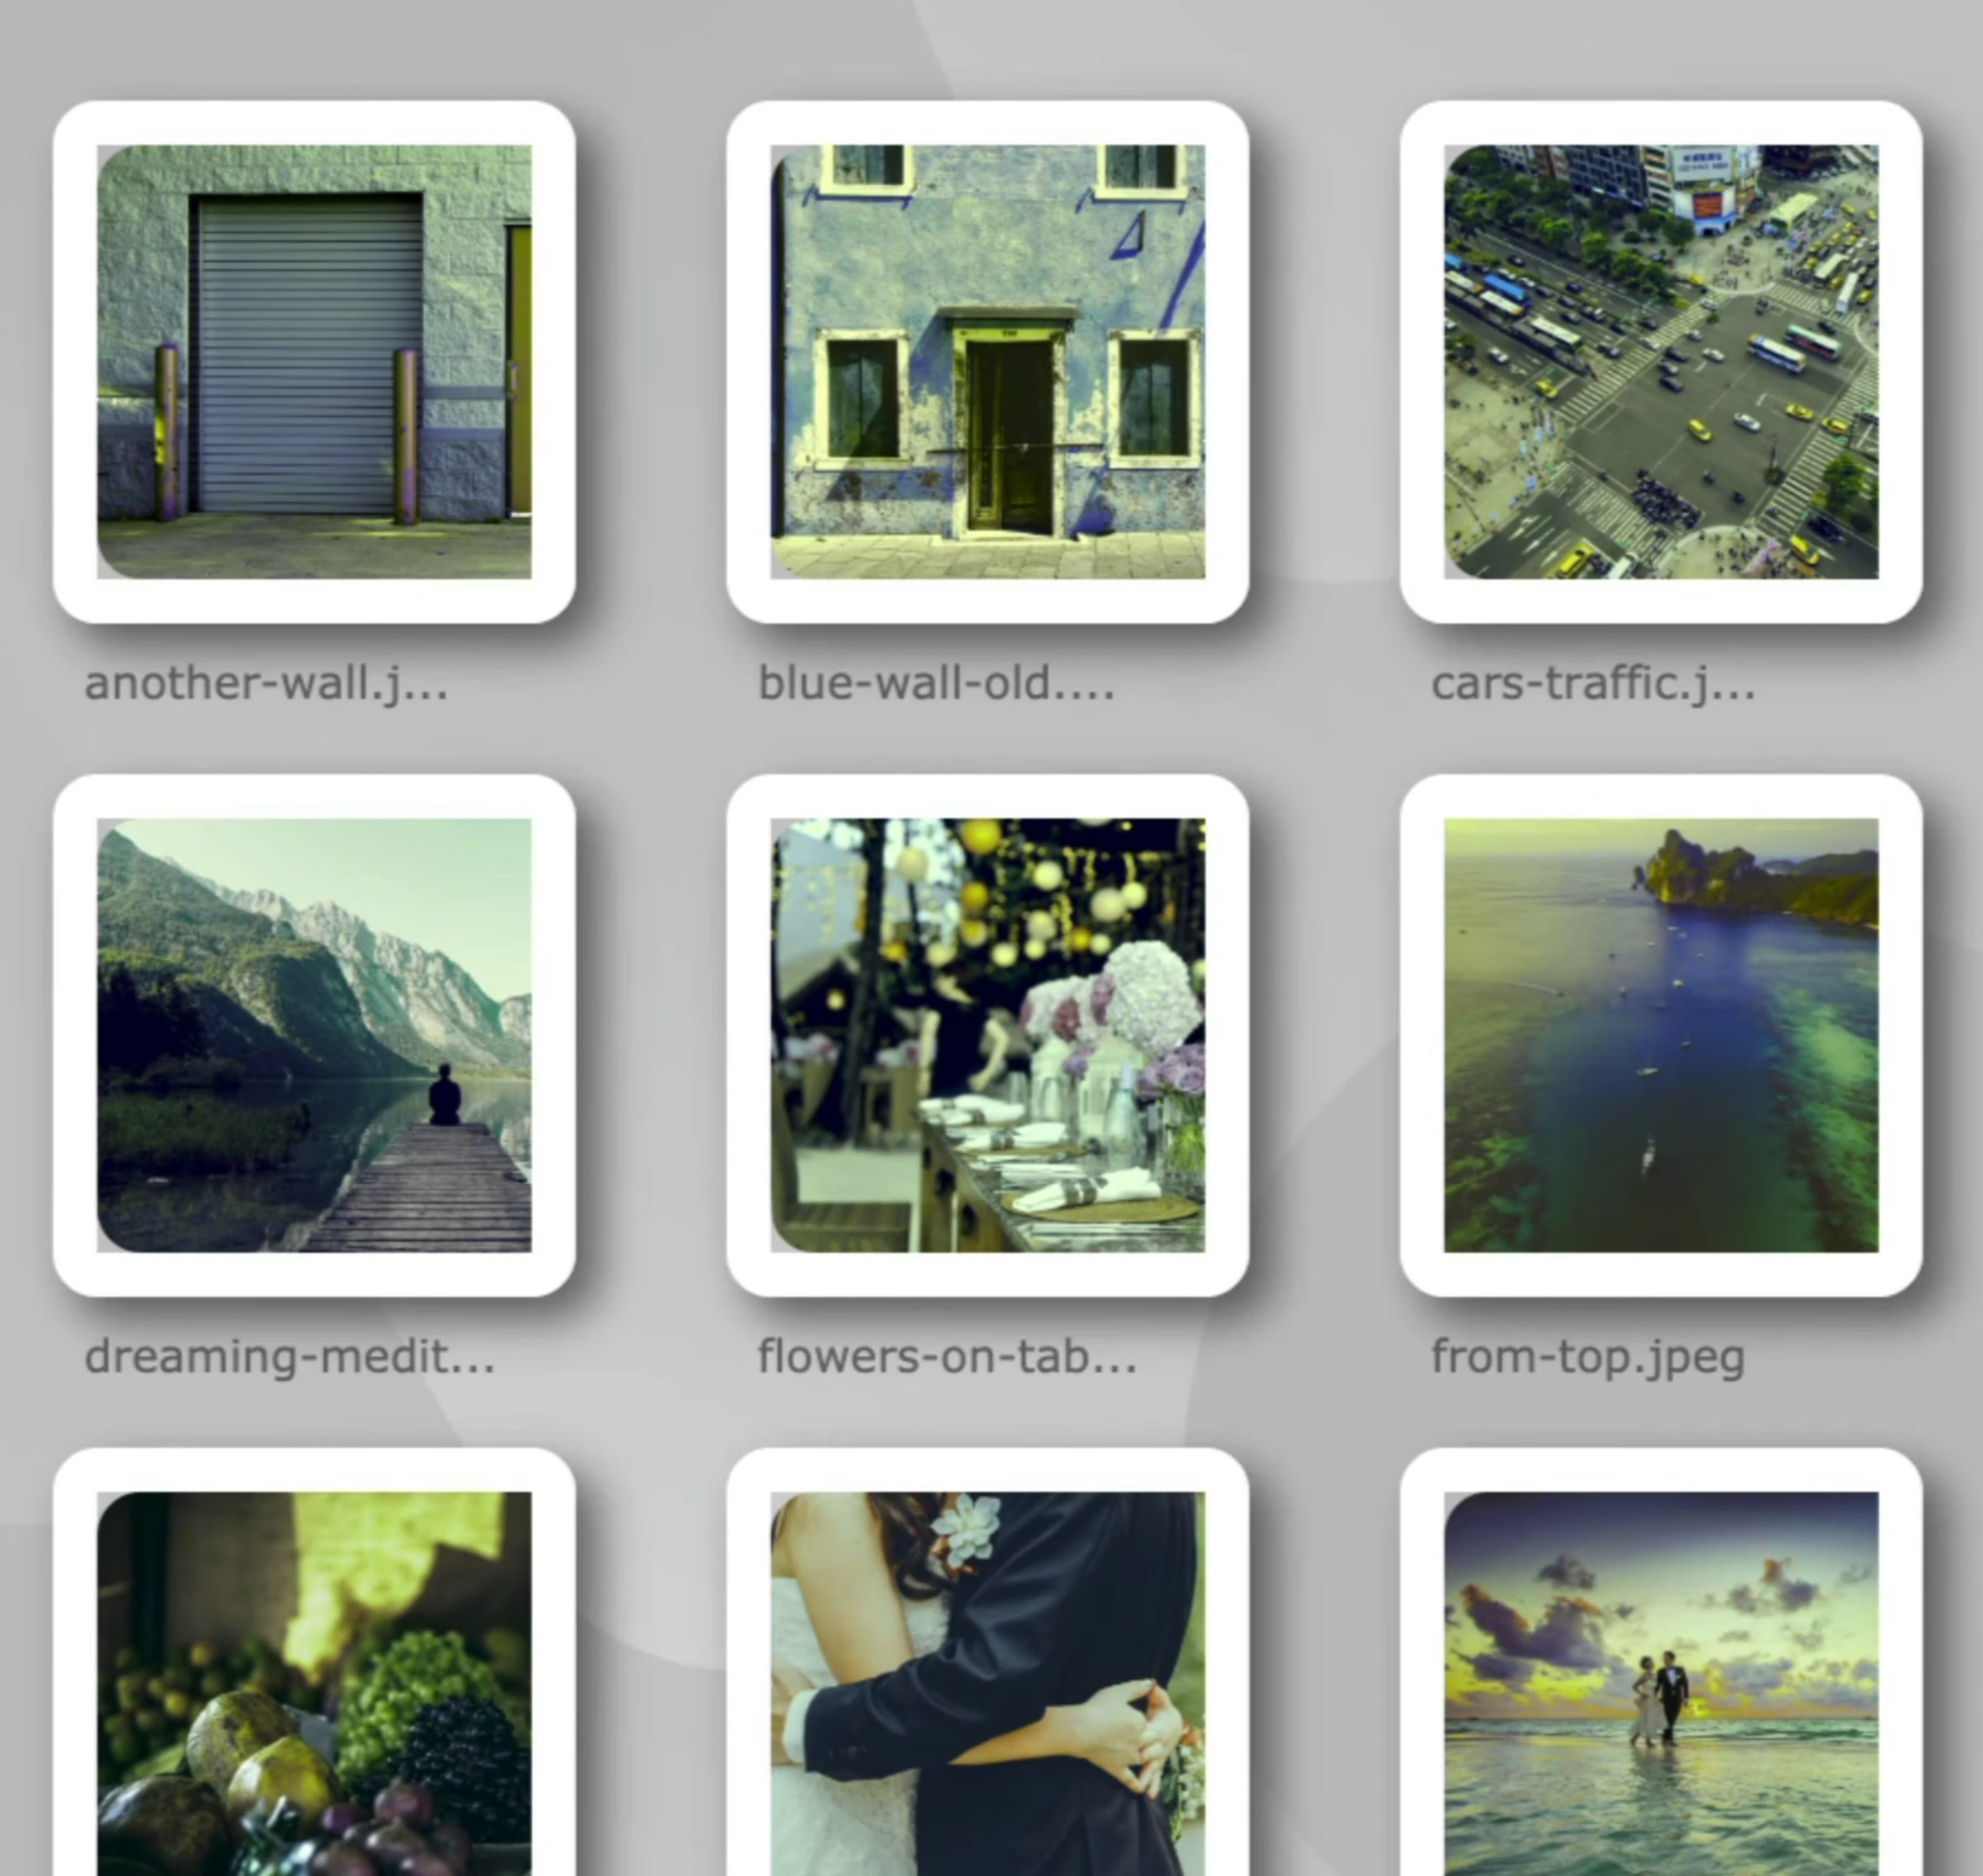 MagicTints Desktop supports Batch Processing of images!
  NOTE: On MagicTints Desktop please use Main Menu items instead of Keyboard Shortcuts. You can also assign Keyboard Shortcuts to the menu items (using Windows/macOS standard procedures).
 If you right-click on the color reference image, a right-click menu will pop up. It will allow you to quickly apply this reference image to the current layer in Adobe Photoshop or locate it in your File Explorer (Windows) or Finder (macOS).