Please use our Anastasiy's Extension Manager to install. Click "Install" and then locate .zxp file you have downloaded.
What's New in version 7: Upgrade MagicSquire ✨ Assign Background Image to Groups. Enhance the appearance of your groups. Assign and apply Tile, Scale or Monochrome effect for seamless group display. Also new group colors: Electric Blue and Khaki. Where to find: Use Group menu (...) -> Set Group Background Image>
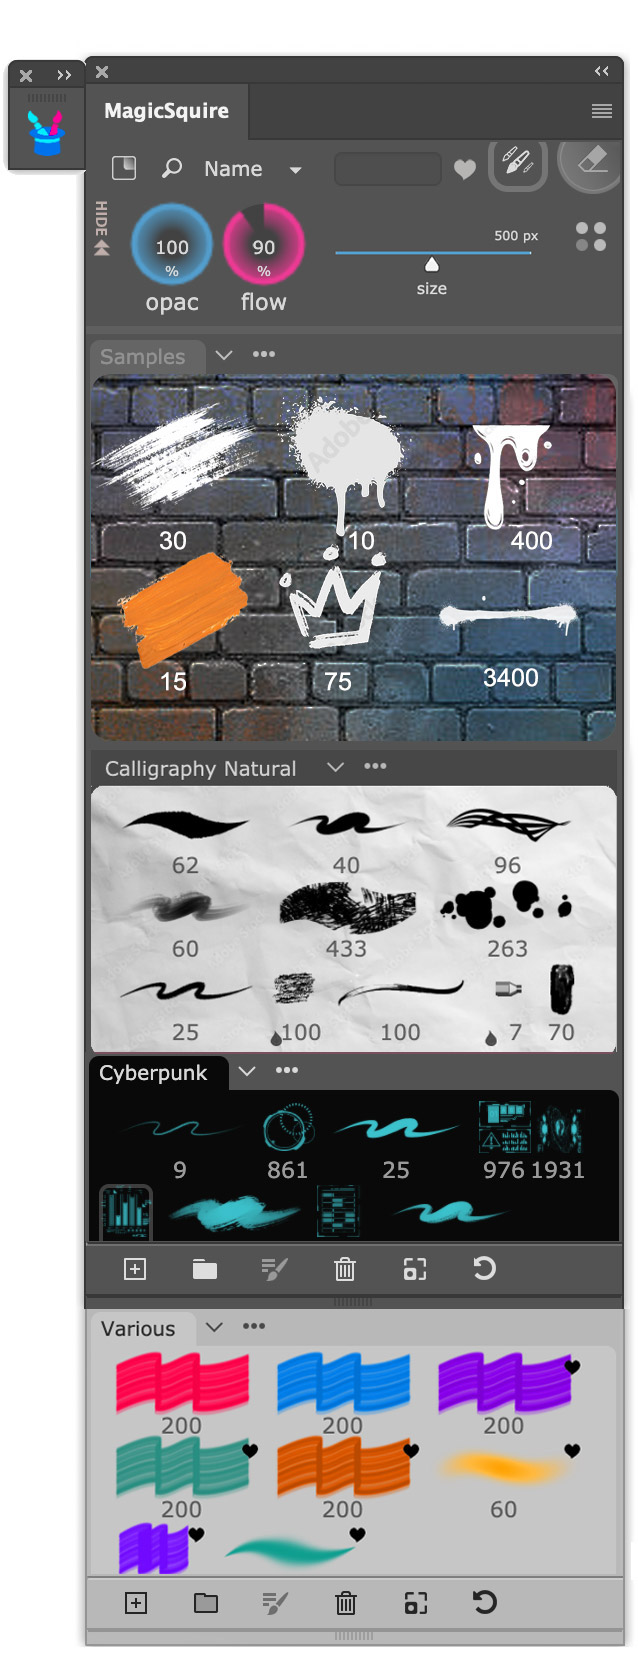
✨ Stroke Thumbnail Color: 1-click color picking with 9 predefined colors (or yours), harmoniously working with all Photoshop color themes and group colors.
Combine Background Images and quick Stroke Colors for stunning beautiful themes of your Brush presentation Where to find: In Edit Tool/Brush dialog
✨ Filter/Search by Kind - quickly switch between Brushes, Erasers, Marquee Presets, Blurs, etc. using a dropdown menu next to the search field. Where to find: Use new dropdown next to Search field
✨ Quick Favorites - access frequently used tools by adding them to Favorites with a right-click, and quickly filter them with the Heart button Where to find: Right-click to add, click new Heart button on top to filter
✨ Truly Scalable UI - scale Brush Controls, Text, and Image Strokes for improved accessibility, with fine-tuning via Thumbnail Scaler and Text Size checkbox. Where to find: Use new Thumbnail Scaler from bottom toolbar and new Text Size checkbox
✨ Direct import of Photoshop Brushes into MagicSquire from fly-out menu Where to find: Click on the menu -> Add brushes from Photoshop.
- Workarounded Photoshop spring-loaded tools problem where tools were reverting back
- Updated framework for much faster redraws of groups
- Full 2023 support
Cheat Sheet:
MagicSquire fly-out menu: • PRO Mode in this mode MagicSquire hides most of the UI, makes it very simple leaving only crucial features • HUD Mode more info below. MagicSquire becomes a popup under your cursor. You can assign a shortcut • Add brushes from .ABR/.TPL load .abr or .tpl file. Supports groups! Also can load multiple files into a single group • Add brushes from Photoshop transfer brushes and groups from Photoshop's Brushes panel to MagicSquire • Export groups to .ABR/.TPL saves groups from MagicSquire into a file • COLLECTIONS lets organize groups into collections, see below • Expand All Groups opens all closed groups immediately • Collapse All Groups closes all open groups immediately • Feedback/support ask Anastasiy Support for help or leave your suggestions • Help opens this page • About displays About box • Keyboard Shortcuts lets you assign keyboard shortcuts to varios MagicSuqire features including HUD hotkey • Settings various settings, see below • Reset panel removes all brushes from the panel, clears data folder and lets you start from scratch
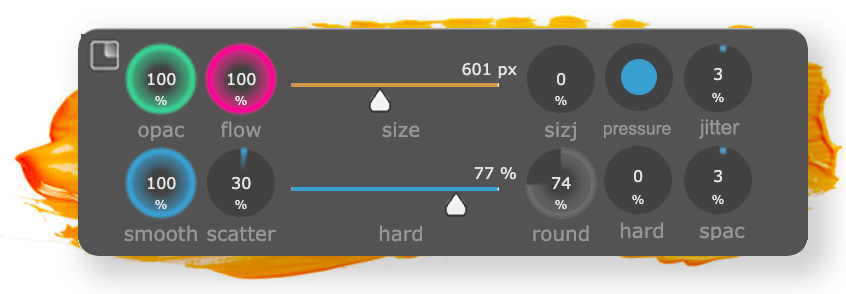
HUD popup:
HUD mode allows you to popup MagicSquire anywhere on the screen under your cursor.
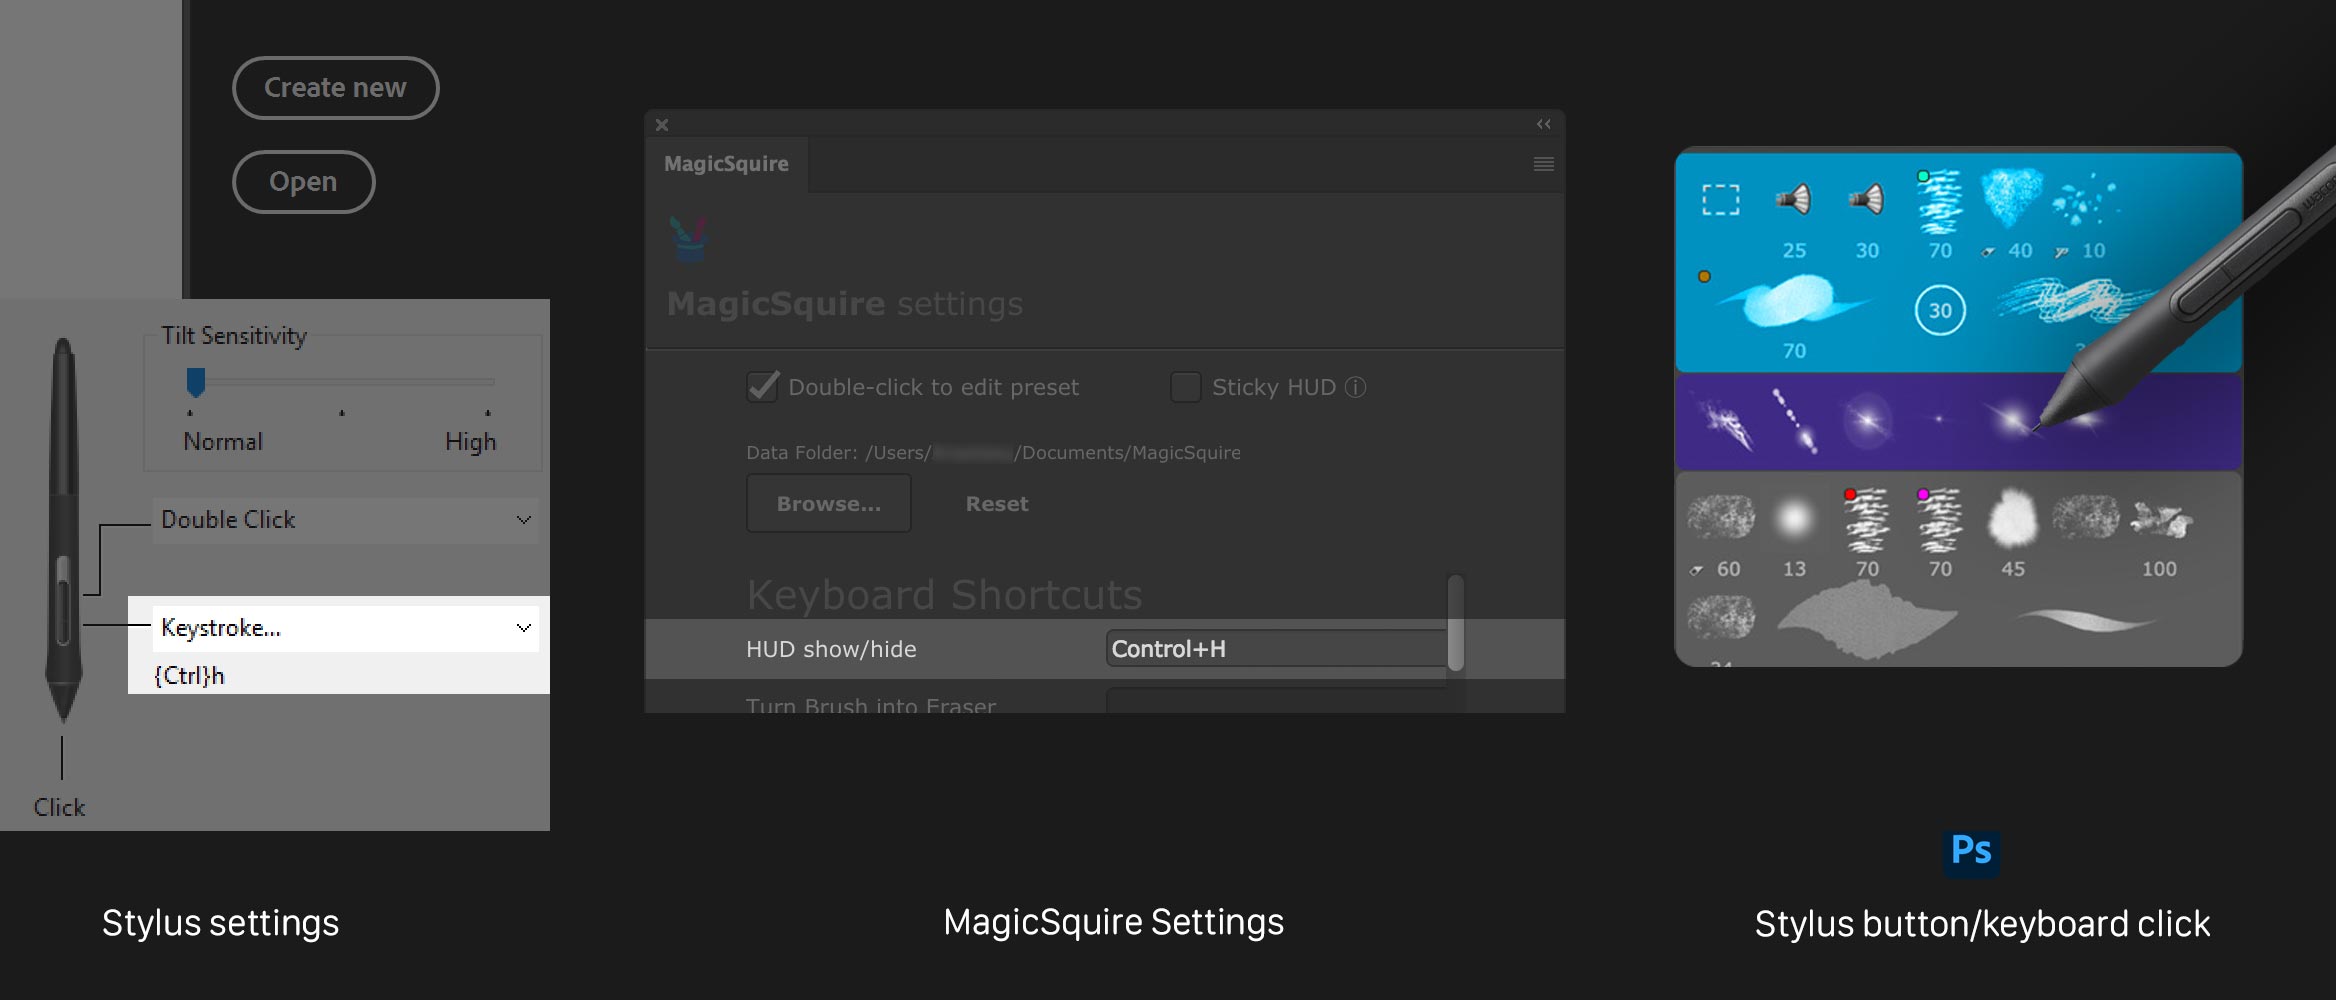
It can be displayed via a keyboard shortcut (defined in Settings) or via a stylus button click (if button click is assigned to that shortcut). Also by clicking "HUD Mode" button on the panel. In optional "Sticky" HUD mode configured so the button press shows the panel and button release hides it.
You can adjust HUD Transparency from Settings from 0 to 100%. You can also activate HUD Background Blur.
1) Go to MagicSquire Settings and assign any keyboard shortcut to the HUD Mode. Even the simplest like Ctrl+H would work!
2*) If you want to display it when clicking a Stylus (Wacom or any other) button – just assign the same keyboard shortcut in its settings
3) That’s it! Now you click a button and MagicSquire will be available any time under your cursor.
Activate special "Sticky HUD" mode. In this mode MagicSquire HUD will popup on key press and hides on key release. You can assign it to a stylus button as well.
HUD mode is a unique way to have all the brushes and groups under your finger(stylus)tips in Adobe Photoshop.
HUD can be configured to display Brush Controls only. Go to MagicSquire menu -> Settings and choose "HUD only controls Brush". In this mode you can quickly adjust your chosen brush parameters in the HUD popup under the cursor. While having the groups of brushes/tool presets in the main panel.
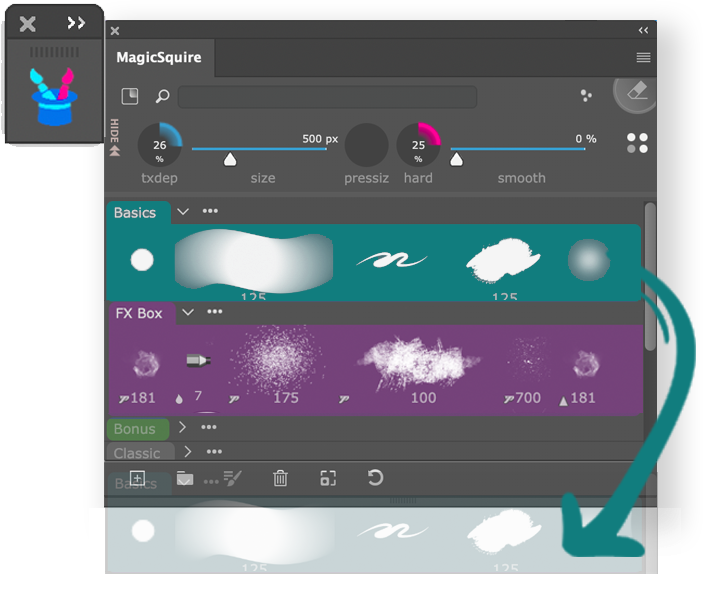
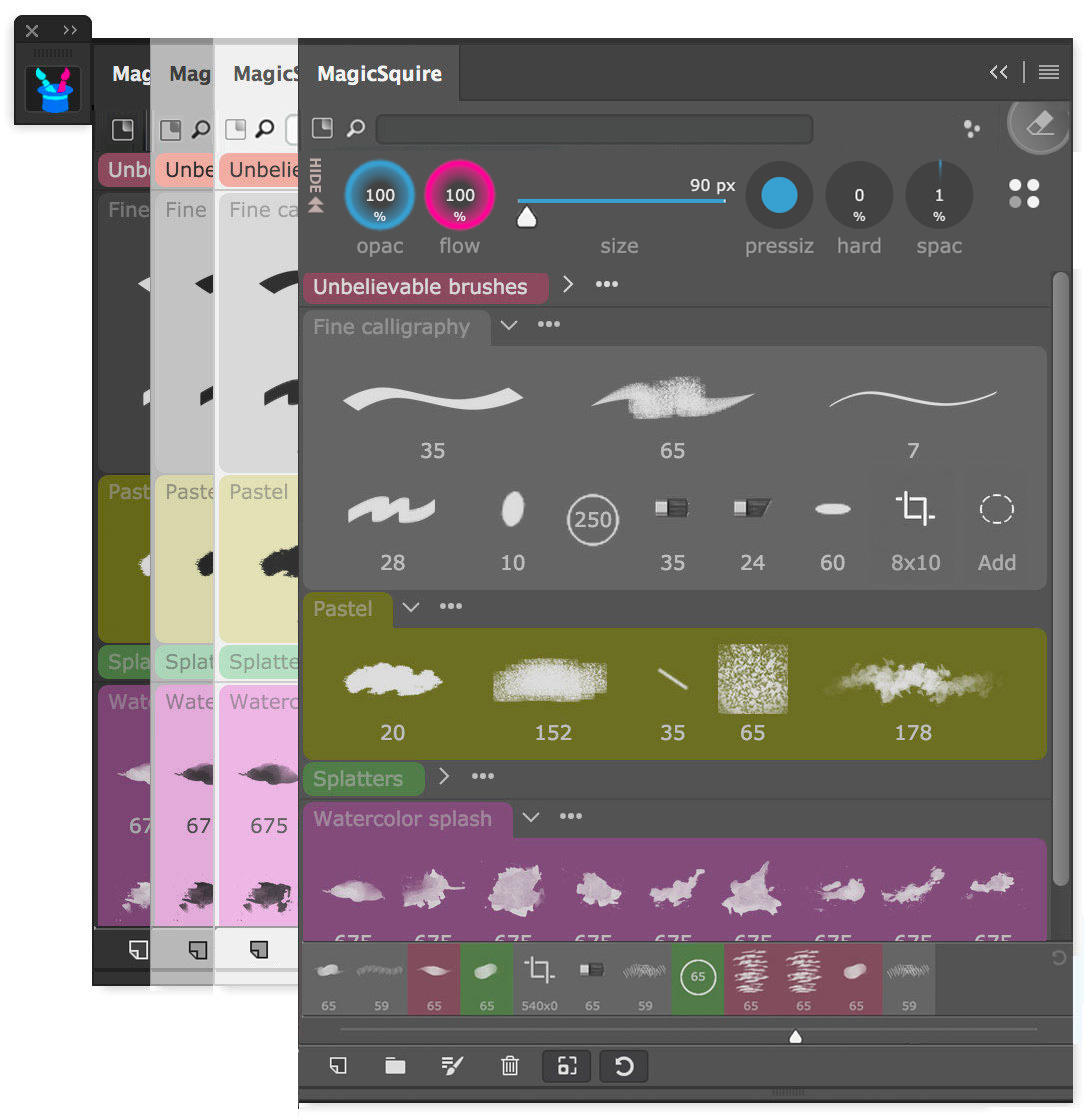
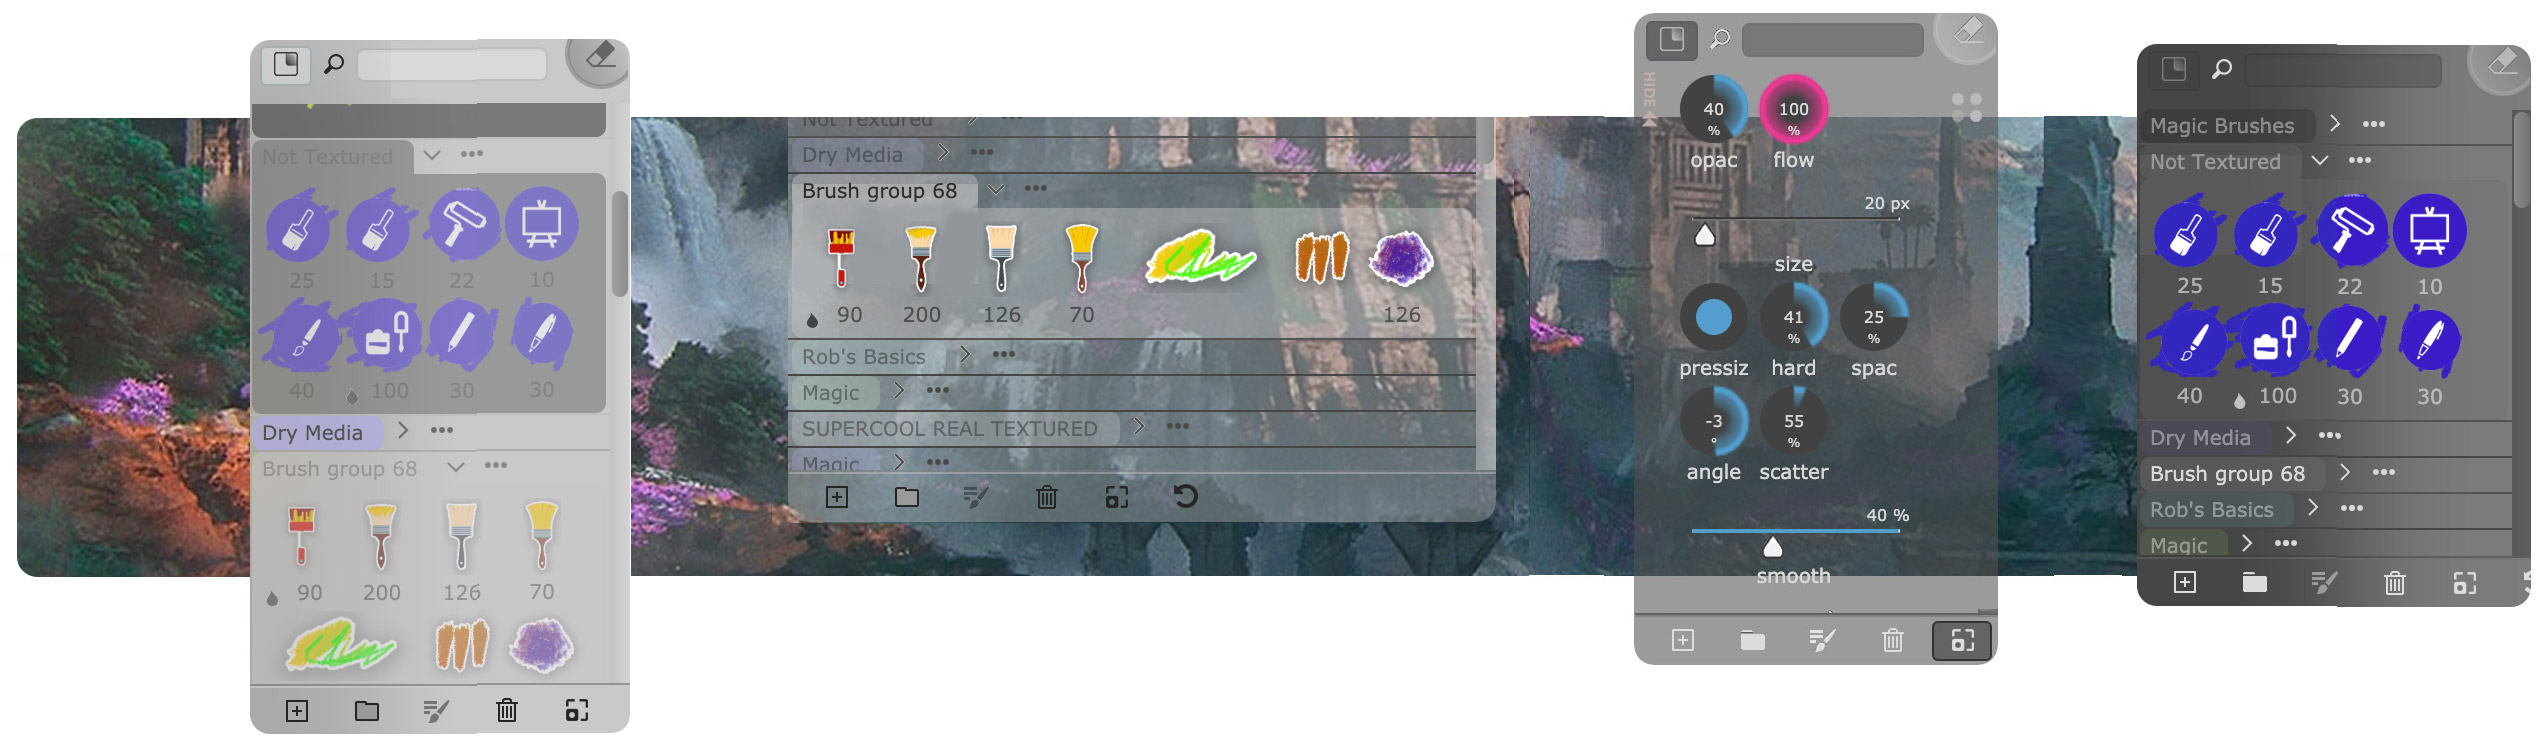
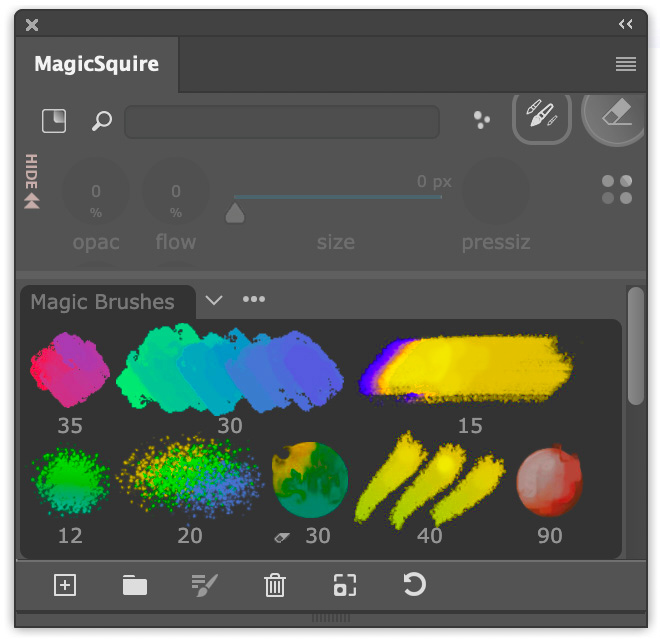
List View modes:
By clicking on View Modes button you can switch between following modes of visualizing the list of brushes:
Mixed — all brushes are displayed in a compact and convenient arrangement Long — brush icons are followed by names in the wide vertical list Short — adaptive list with 2,3,4 and more columns depending on the panel size Horizontal — displays all brushes in a horizontal list (very handy if you attach the panel to the bottom of your Photoshop)
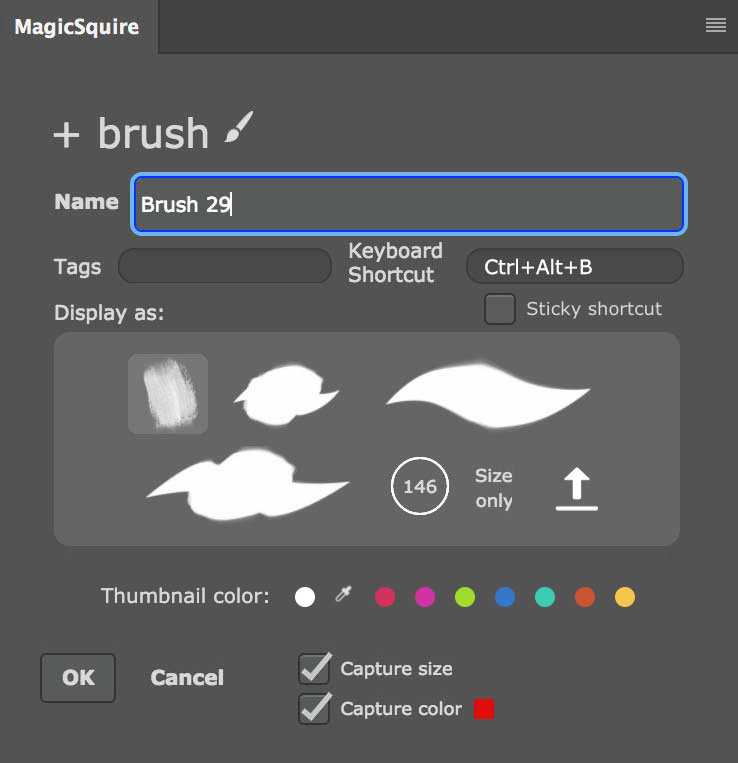
Brush/Tool Parameters, Tags, Keyboard Shortcut to Brush/Tool preset Click on New button on the bottom toolbar to add current brush or tool into MagicSquire. You will be presented with the Brush/Tool Parameters dialog.
Assign tags or a keyboard shortcut to the preset.
Sticky Shortcut – if you turn it on then the brush/tool preset will be activated only temporarily when you press the shortcut. Photoshop will switch back to previous tool when you release the shortcut.
You can also choose a stroke image better representing your tool. Strokes are auto-generated on the fly and are displayed as high-resolution images that precisely represent tool's parameters (like size, texture, scattering, Mixer Brush parameters etc.).
Pick Size only to save just the size of the current brush/tool. Next time when you click this preset only the size will get restored.
Click Custom Image button to assign any colorful image to your Brush/Tool preset. You can use most image file formats like .jpg, .png or .gif (or even .svg and vector images!).
Click on the color under Thumbnail color to choose color of the brush stroke thumbnail. Click on the eyedropper to pick arbitrary color
Turn on Capture Size (on by default) to save preset's size with the preset. So next time when you click it the size will restore. Turn it off to save as a sizeless preset (tool or brush).
Turn on Capture Color to keep preserve current foreground color with the preset
To change appearance or tags of multiple presets at once:
- select presets then right click on any of them
- choose "Edit preset(s)"
- click on the appropriate brush stroke type, or define new tags
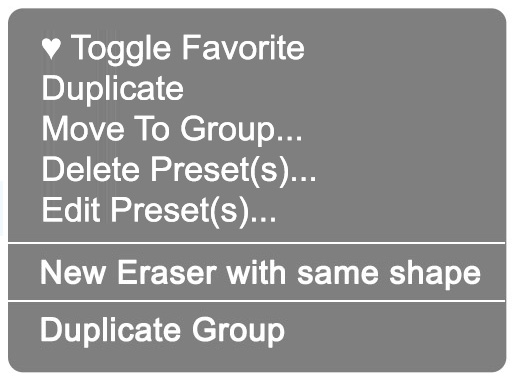
Right-Click Preset menu and Favorites Right-Click on the Brush or Tool Preset to display a menu that lets you quickly operate on the Presets and Groups:
♥ Toggle Favorite – add/remove current preset(s) to/from Favorites. To quickly see all Favorites click the Heart icon on the top
Duplicate – duplicates currently selected Preset(s) Move To Group... – opens up a dialog where you can choose a group to move this Preset to Delete Preset(s)... – deletes one select preset or multiple Edit Preset(s)... – edit one select preset or multiple. You can change stroke type or tags on multiple selection New Eraser with same shape – converts currently selected Preset into an eraser and adds it to the group as new Eraser Preset Duplicate Group – duplicates currently selected Group and all its contents. All brushes and tool Presets in the new group become an autonomous set
Close after click
MagicSquire can close immediately after you click/select a brush or tool preset. It works only in HUD Mode. To enable this go to Settings and turn on "Close HUD on Preset selection". Next time to open it up use keyboard shorcut (set up in Settings). Then when you click a brush MagicSquire would automatically disappear. Saves clicks!
Collections
You can combine several brush groups into a Collection. Click on "edit..." or "more..." under the COLLECTIONS menu item in the MagicSquire menu to launch Collections Editor. Now you can delete collections, create new collections and assign existing groups to Collections.
Quickly switch between collections by clicking Collection name from MagicSquire menu. You can also switch active collection by single-clicking its name in the Collections Editor.
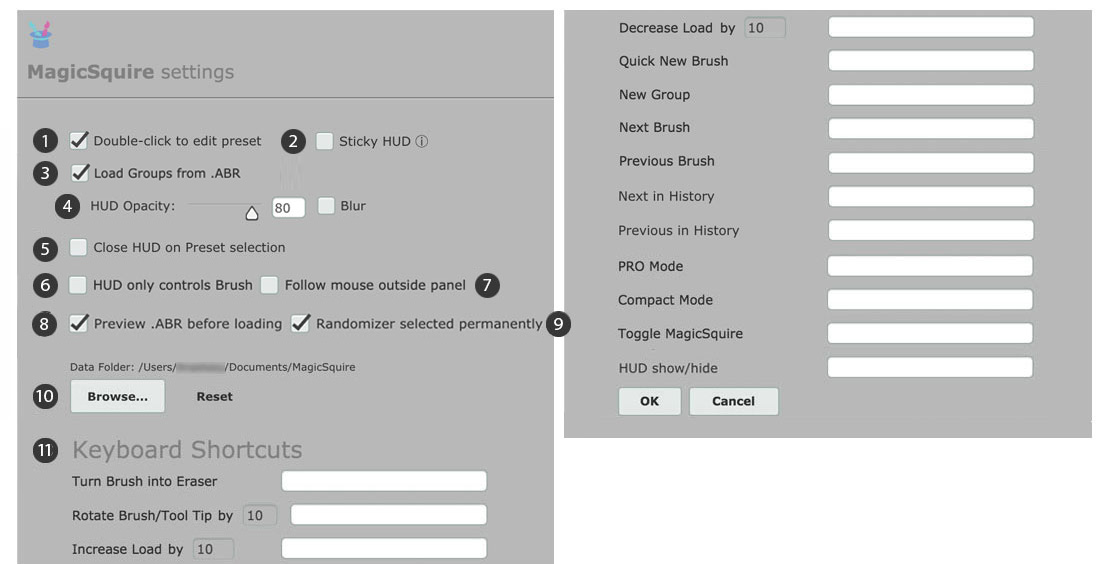
Settings:
To access Settings click MagicSquire menu -> Settings...
1. Set "Double-click to edit preset" to ON to activate editing brush/tool presets with double click. You can always edit preset using
the Edit button the bottom toolbar (see above)
2. "Sticky HUD" activates special mode for the HUD. In this mode MagicSquire HUD will popup on key press and hides on key release. You can assign it to a stylus button as well.
3. Load Groups from .ABR. If ON will load groups on .ABR load into separate MagicSquire groups. If OFF it will load all brushes from all groups into the current group
4. HUD Opacity & Blur. Adjust those to make HUD fully transparent or activate background Blur
5. Close panel immediately after selecting a preset — see more in Close after click
6. HUD only controls Brush — set this ON to display only Brush Controls in the HUD. This way you can keep Brush Groups in the main panel and quickly adjust Brush/Tool parameter using the HUD popup
7*. macOS-only: Follow mouse outside panel — set this ON if mouse is not tracked while adjusting Brush Controls and moving your mouse/stylus cursor outside the panel
8. Preview .ABR before loading allows to see contents of .ABR files (tip images) before actually loading the files. You are also able to select which files to load based on the previews
9. Randomizer selected permanently. When it's ON and Brush Randomizer is active then MagicSquire would select a new random brush from the current group after every click on the document. When it's OFF you need to click Brush Randomizer button every to pick a random preset
10. To relocate your data folder from Documents click "Browse" and choose the new folder.
This way you can put MagicSquire data folder to a 3rd party Cloud service like Dropbox, iCloud or Google Drive and sync MagicSquire brushes, groups and collections between multiple computers, also keeping your data safe and backed up.
On one computer relocate your brushes to the Dropbox folder. And on the second (or any other) computer do the same and answer Yes on the question "Use existing MagicSquire data?".
11. Also in Settings you can assign Keyboard Shortcuts to the following features: Rotate Brush/Tool tip (works with Clone Tool too), Turn current Brush into Eraser (and back), Increase/Decrease Load for Mixer brushes, Switch Collection, Create New Brush, New Group, Switch to next/previous brush in current group, Next/Previous Brush in History, PRO Mode, Compact Mode, Toggle MagicSquire panel.
Keyboard Shortcuts:
MagicSquire supports assigning keyboard shortcuts to the following features (via Settings dialog):
HUD show/hide – assign key to display/hide HUD popup Turn Brush into Eraser – convert current brush into an eraser (preserving tip, texture etc) Rotate Brush/Tool tip by – rotate brush tip image by a degree (you can change degree in Settins) Find Preset – find preset by name Increase Load by – increase brush load Decrease Load by – decrease brush l Quick New Brush – quickly create brush and add it to current group New Group – create new group and activate it Next Brush – select next brush in current group Previous Brush – select previous brush in current group Switch Collection – switch current collection of groups PRO Mode – activate PRO Mode with only minimal information visible on the panel Compact Mode – activate Compact Mode that hides MagicSquire into an icon and auto-displays it when hovering mouse over it Activate individual brushes – assign separate key shortcuts to different brushes through Brush Settings dialog and change them in Settings Toggle MagicSquire – toggle panel on/off with a shortcut
Data folder:
Data folder can grow.
Big data folder allows very fast loading and dealing with brushes. Your data folder can grow to up to 200MB for approximately 500 brushes in MagicSquire. The unique caching algorithm allows to open up the panel very fast and scroll thousands of brushes with up to 60fps speed. It's made possible by special structuring and how brush data is saved.
Truly unlimited!
This technology allows to add unlimited number of brushes into the panel. 15, 250 or 2,000 brushes will be handled by MagicSquire easily.
Optimize performance/fix errors:
To improve MagicSquire perfomance and increase speed of the UI - it's highly recommended to close your Photoshop's Brush Presets (called Brushes in later Photoshop) and Tool Presets panels altogether.
If you further experience a slow performance of the panel or see errors (like "error #603" or "error #51") please click MagicSquire fly-out menu and then choose Optimize performance. That will rebuild MagicSquire brush database and will get rid of possible errors.
FAQ:
Can I delete Brush Presets or Tool Presets from Photoshop?
Absolutely yes! You can do anything to Brush or Tool Presets in Photoshop and it won't affect your presets stored in MagicSquire panel. You can move, rename, delete, rearrange them inside Photoshop the way you want.
How to to transfer data between computer and backup brushes?
MagicSquire saves backups of your data in case of anything happens with Photoshop you will have your brushes in a safe place. And your data is safe when you switch across Photoshops. You can transfer your data between computers: simply copy MagicSquire folder from Documents folder on your old computer to Documents/MagicSquire on the new computer! That's it.
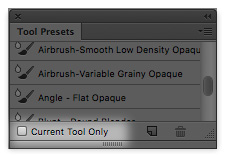
I receive the message "Please uncheck "Current Tool Only" in your Tool Presets panel...". What does it mean?
You need to open the native Photoshop's Tool Presets panel and in the bottom of it uncheck the corresponding checkmark:
How can I change brush group's color to an arbitrary value?
Starting from MagicSquire 2.3 you can pick arbitrary color for the group using color picker. Click on the three dots next to group's name and then click eyedropper icon to launch Photoshop's color picker.


 1) Go to MagicSquire Settings and assign any keyboard shortcut to the HUD Mode. Even the simplest like Ctrl+H would work!

 Click
Click 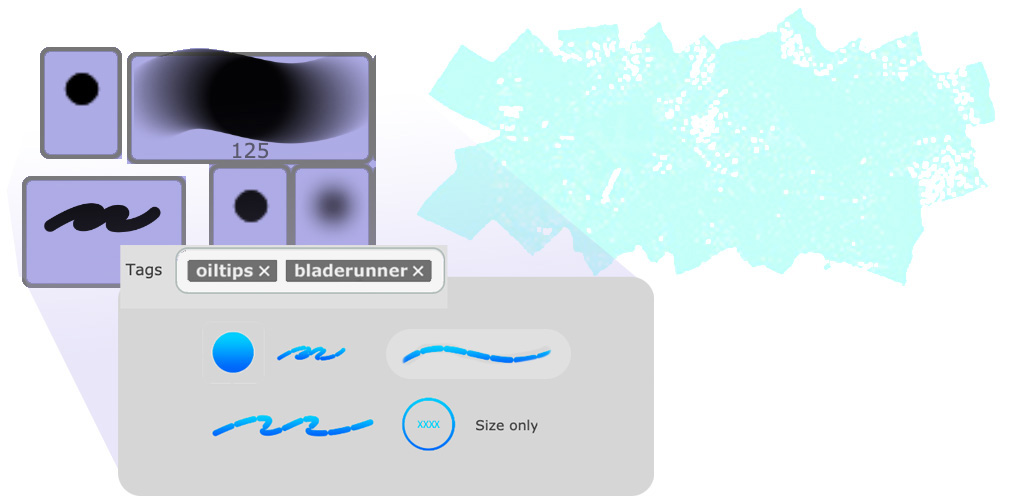
 Right-Click on the Brush or Tool Preset to display a menu that lets you quickly operate on the Presets and Groups:
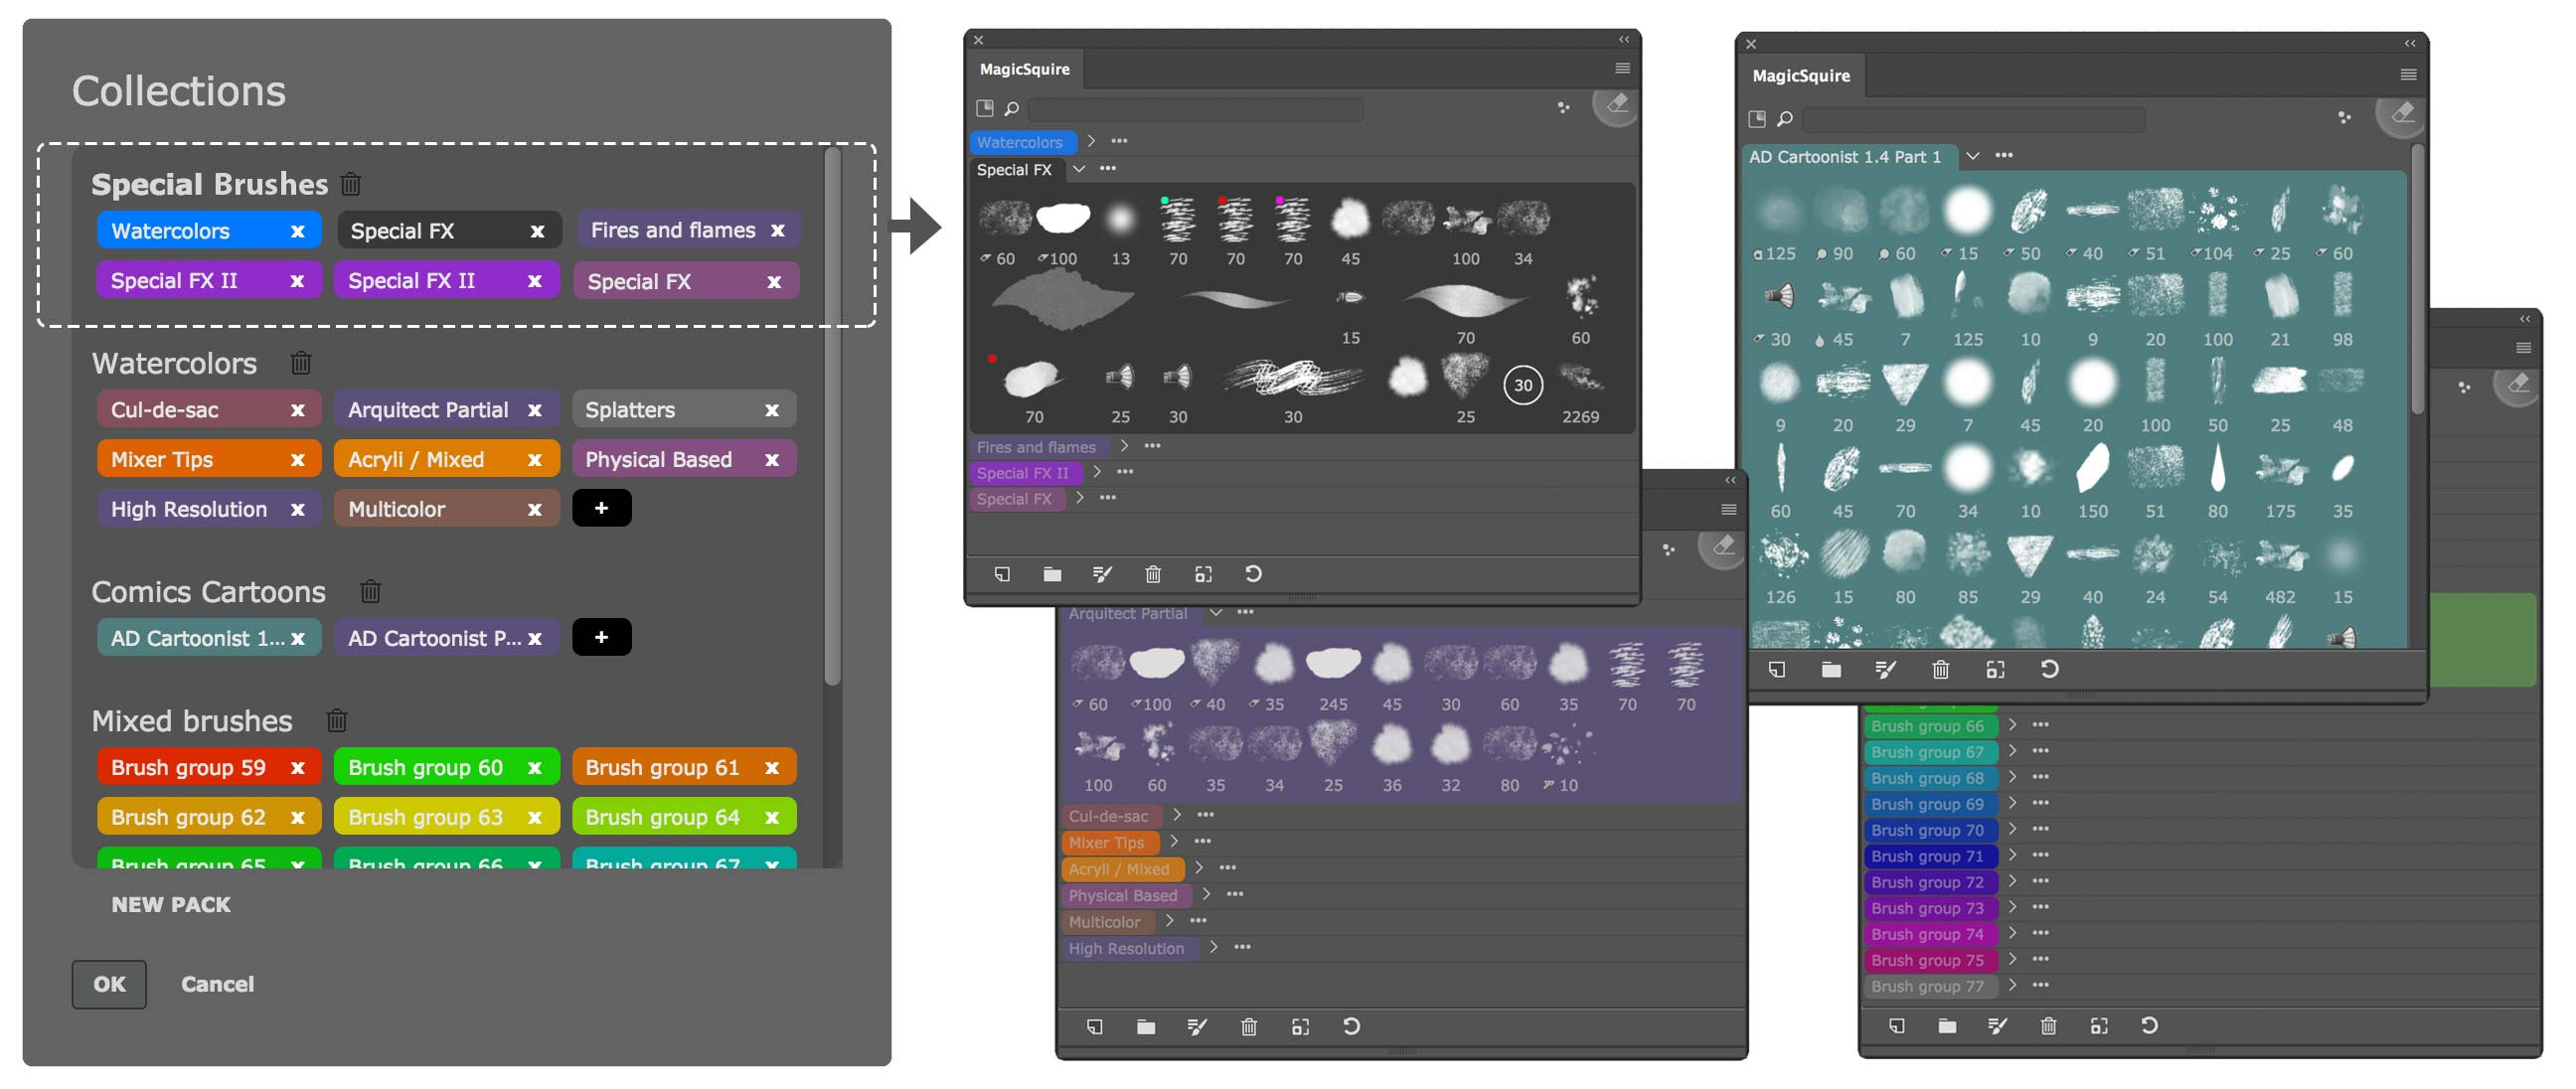

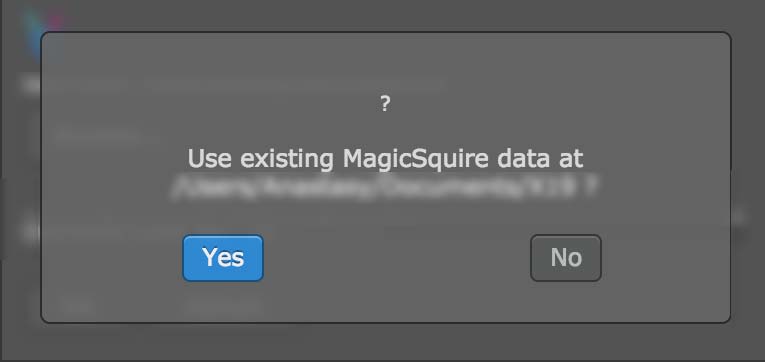 This way you can put MagicSquire data folder to a 3rd party Cloud service like Dropbox, iCloud or Google Drive and sync MagicSquire brushes, groups and collections between multiple computers, also keeping your data safe and backed up.